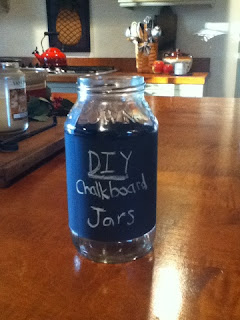
This is basically what I did in a step by step tutorial. Have fun!
You will need:
- Chalkboard spray paint
- An empty jar (pasta sauce jars are a great)
- Masking Tape
- A large strip of cardboard or an old box you don't mind breaking (optional)
- Disposable gloves (optional, but I really suggest them so you don't have to worry about your hands)
- Chalk
 |
| I used this paint, because it's what we already had. |
1. Tear off the label, and rinse out the jar thoroughly. Let them air dry overnight.
 |
| Left: This is my pretty juice jar that I painted black Right: The pasta sauce jar that I painted with chalkboard paint |
2. Spread out the cardboard on the ground. If you have a box, fold it so it lies flat.
3. Use the tape to line the jar, as seen below.
4. Make sure you press the tape around the edges so that the paint won't run underneath the loose tape. I press really hard to ensure that clean edge when I peel the tape off.
5. Tape the bottom of the jar so paint won't get on it.
 |
| This is what it should look like at this point. |
9. Spray a double coat (follow steps 6-8).
10. When the jar is completely dry, peel off all the tape in a downwards motion. Now you're finished! :)
 |
| All finished! Yes, my writing was sloppy. |
Quick tip: Chalk can sometimes be messy or hard to use. Sharpen a long piece of chalk with a pencil sharpener to write those fine, clear messages!
The other jar and cans I painted that day...
 |
| Used this paint. |
 |
| The soup cans... a work in progress. |
 |
| All finished! |
 |
| The juice jar |
 |
| All finished! |


No comments:
Post a Comment